Manage actions
1. Create a new action
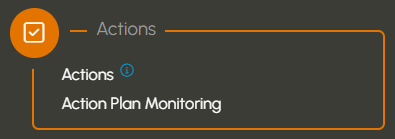
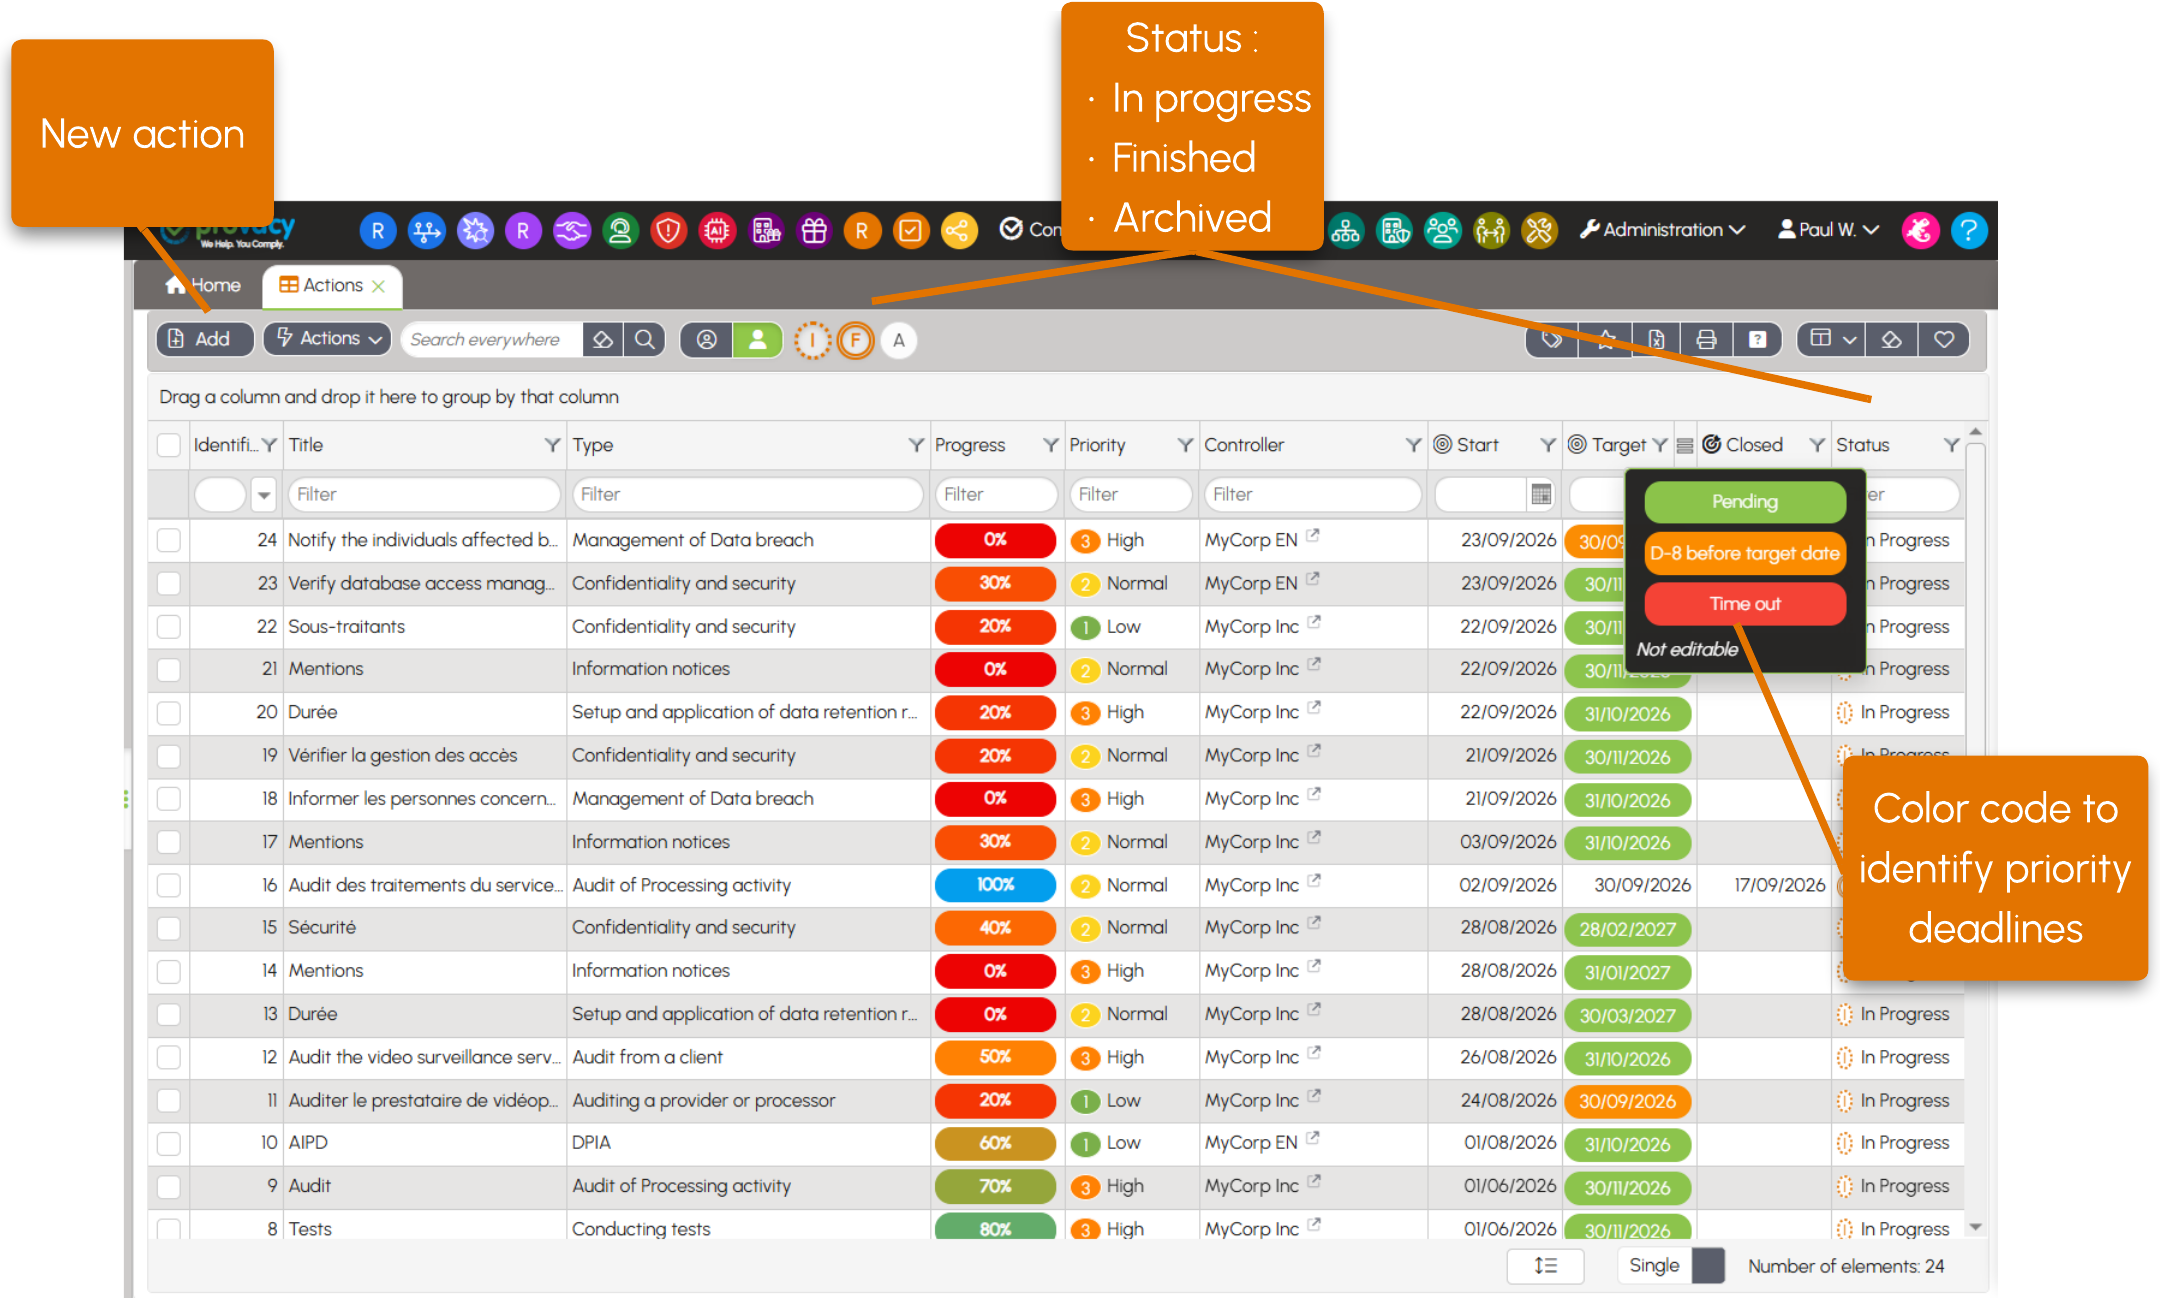
To create an action, select Actions from the Compliance menu, then click Add.


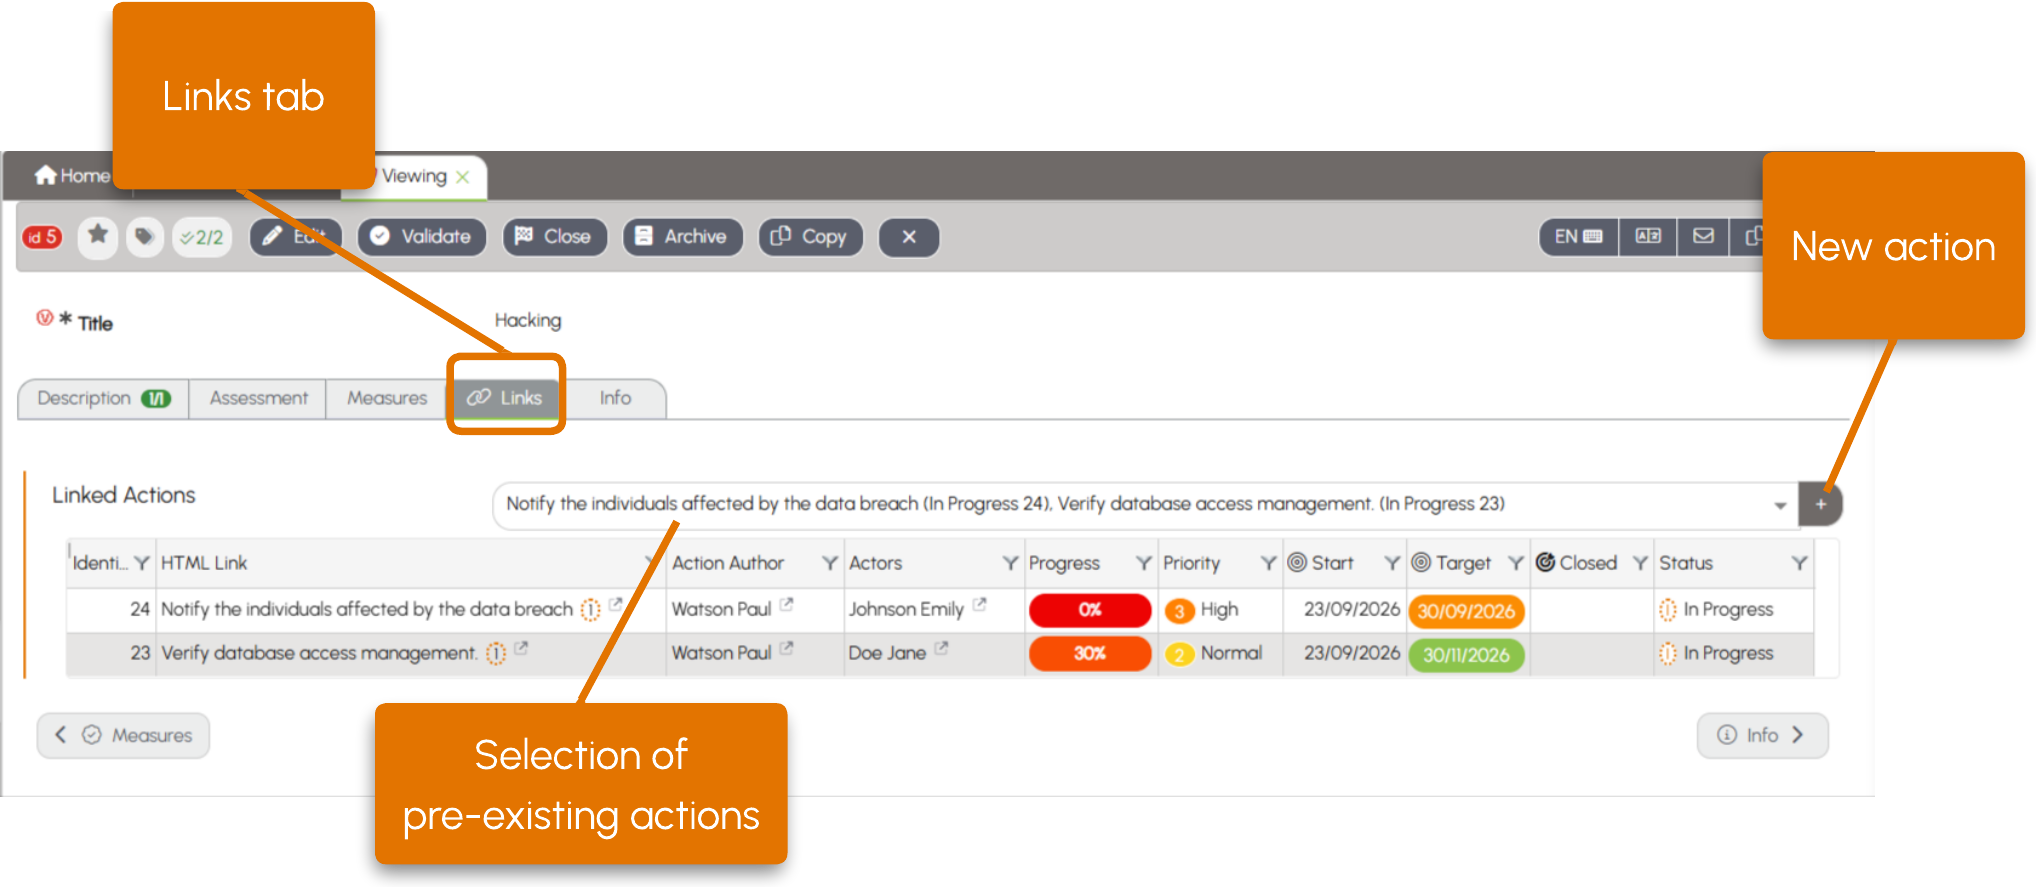
You can also create an action from any form: in the Links tab, click the + in the Linked actions selector.
2. Complete the Action form
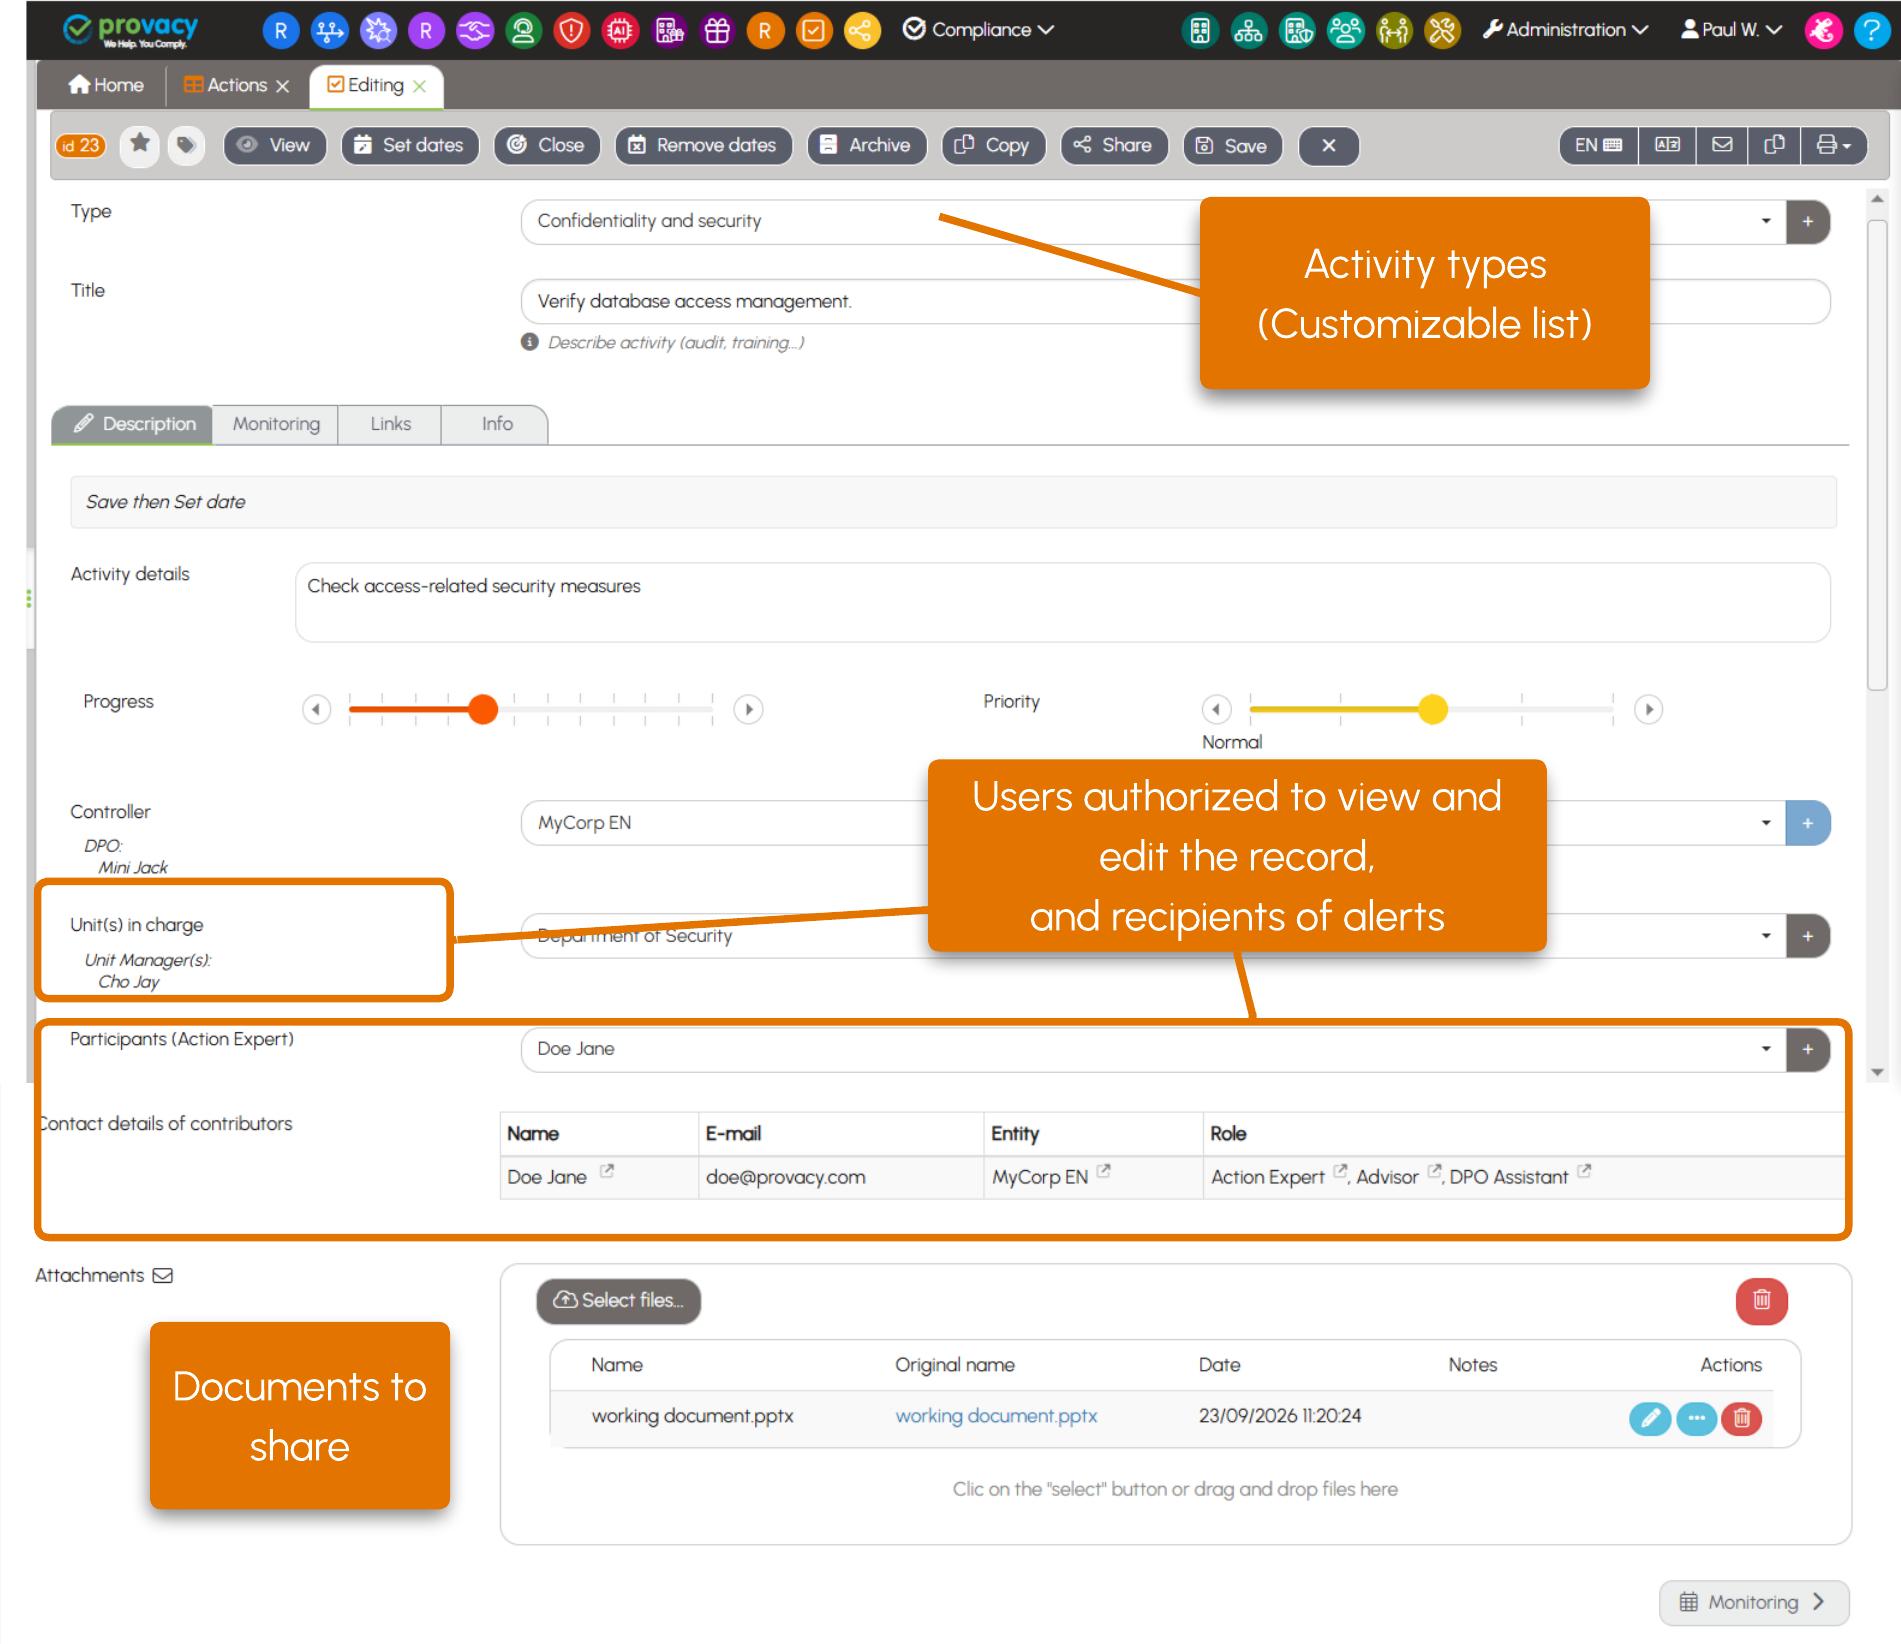
Select the activity type. A list of types is provided by default. The administrator can customize it from Administration > Object parameters > Actions > Types, or create a new type by clicking the + in the selector.
The referents or managers of the selected scope (entity or unit) are automatically associated with the action. You can also add other users as Participants (Action Expert).
Associated users can view and edit the action form. Read-only roles are also available. Contact Provacy Support to request them.
Then complete the following fields:
- Details: describe the action to be carried out;
- Progress: indicate the completion level using the slider;
- Priority: set the priority level;
- Attachments: add any documents needed to carry out the action.
3. Save
4. Set dates and reminders
Once the form has been saved, click Set dates.
The Set dates window contains three elements:
- Start date; ;
- Due date; ;
- Send emails related to tracking: this option is checked by default.
The start date defaults to the current date. An information email will be sent to the participants the following day, including a link to the record (configurable).
The Due date is used to automatically schedule reminders:
- a first reminder 8 days before the due date;
- a second reminder 1 day before the due date.
- Additional reminder emails can be scheduled. Contact Provacy Support to request them.
Uncheck Send emails related to tracking if you do not want these reminders to be sent.
The dates you have set can be viewed in the Tracking tab. To modify them, click Set dates again. The Remove dates button automatically deletes the dates.
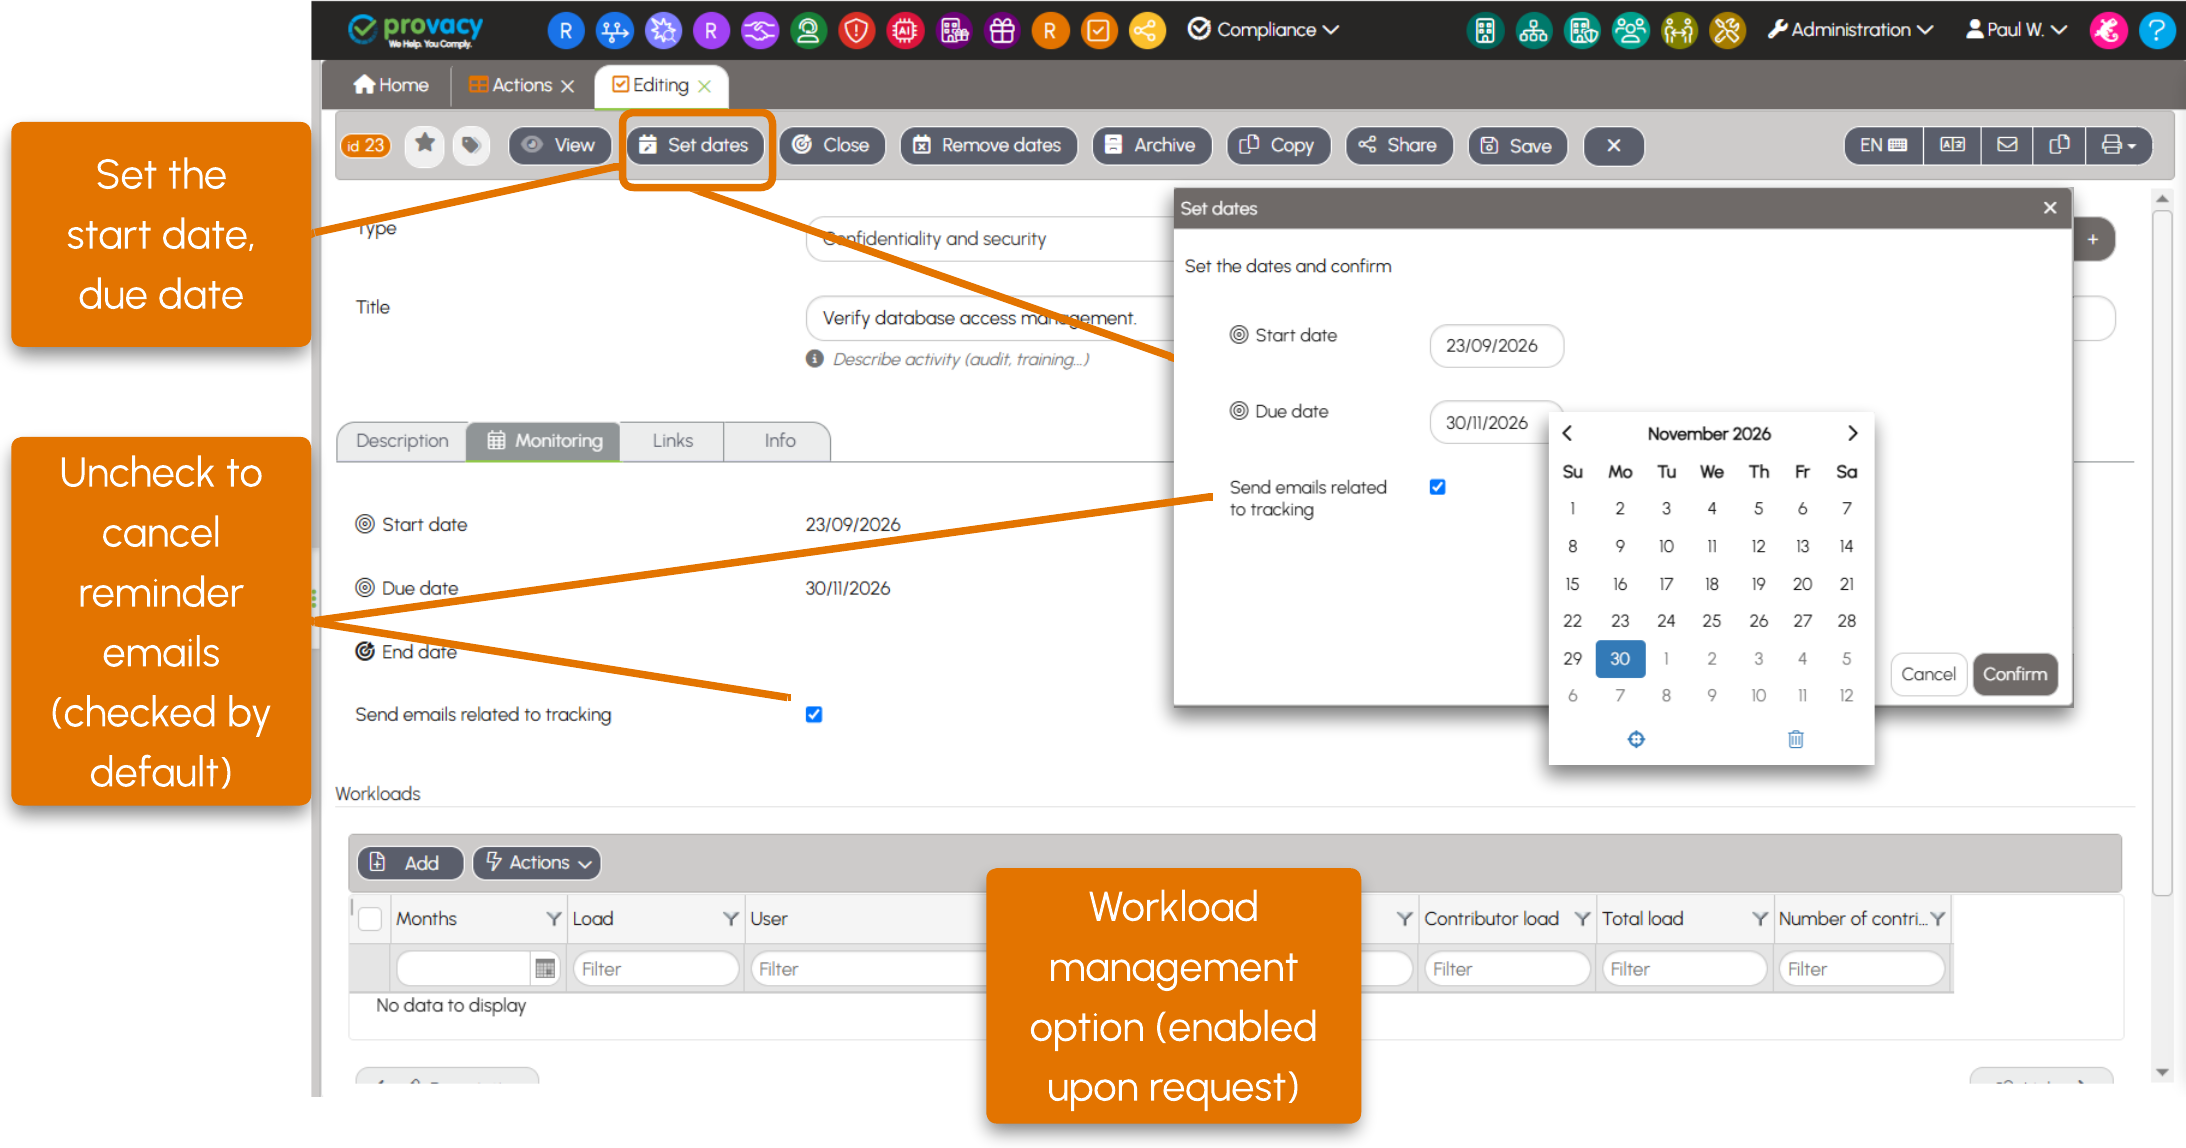
The workload management feature is described on the following pages.
5. Link objects to the action plan
From the Links tab, you can link the relevant objects to the action, such as processing activities, data subject requests, data breaches, etc.
When an action is created from the Links tab of an object (Processing Activity, Data Subject Request, Data Breach, etc.), the link to that object is created automatically.
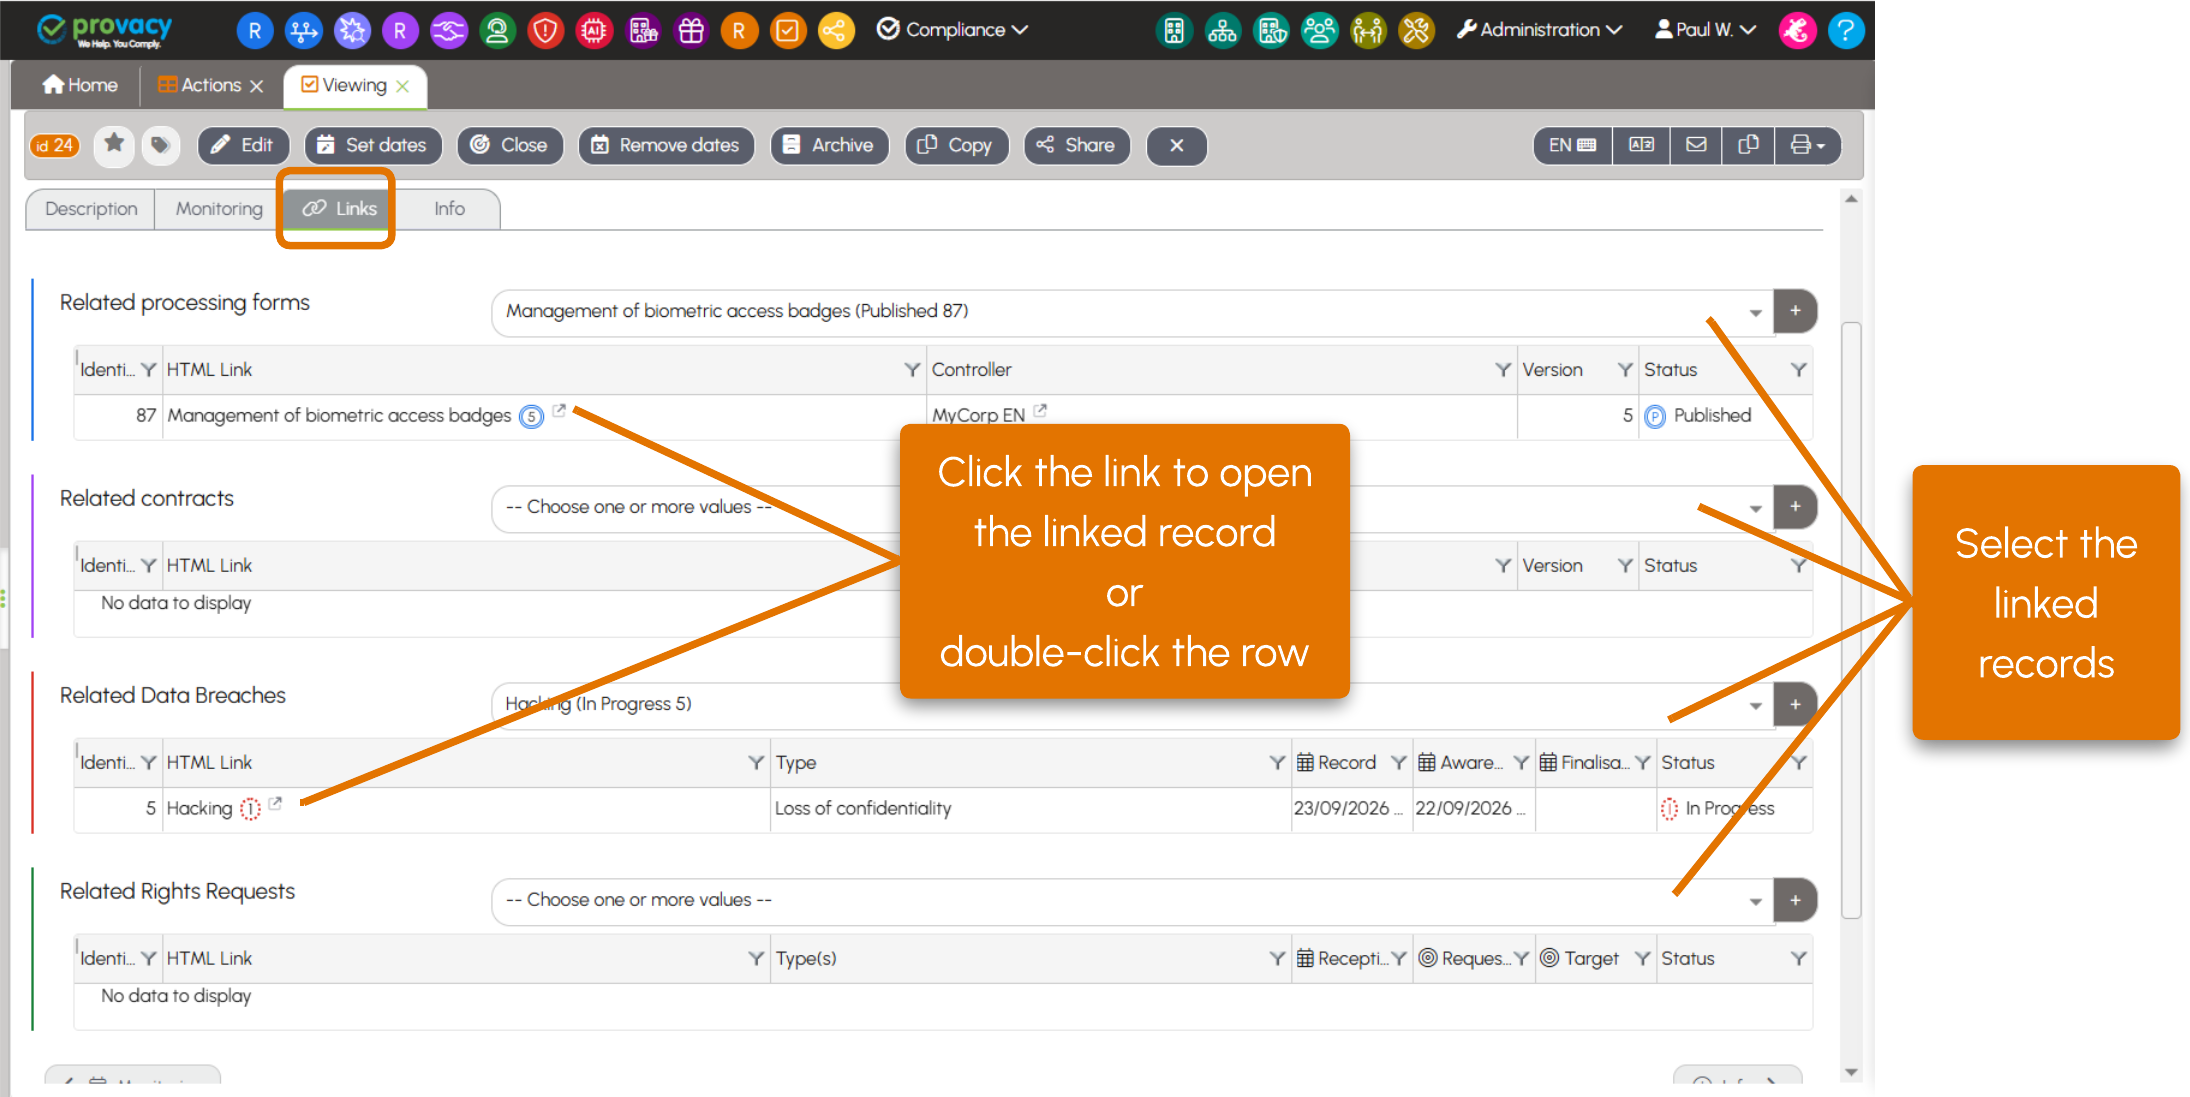
This feature makes it easy to navigate between linked items, for example:
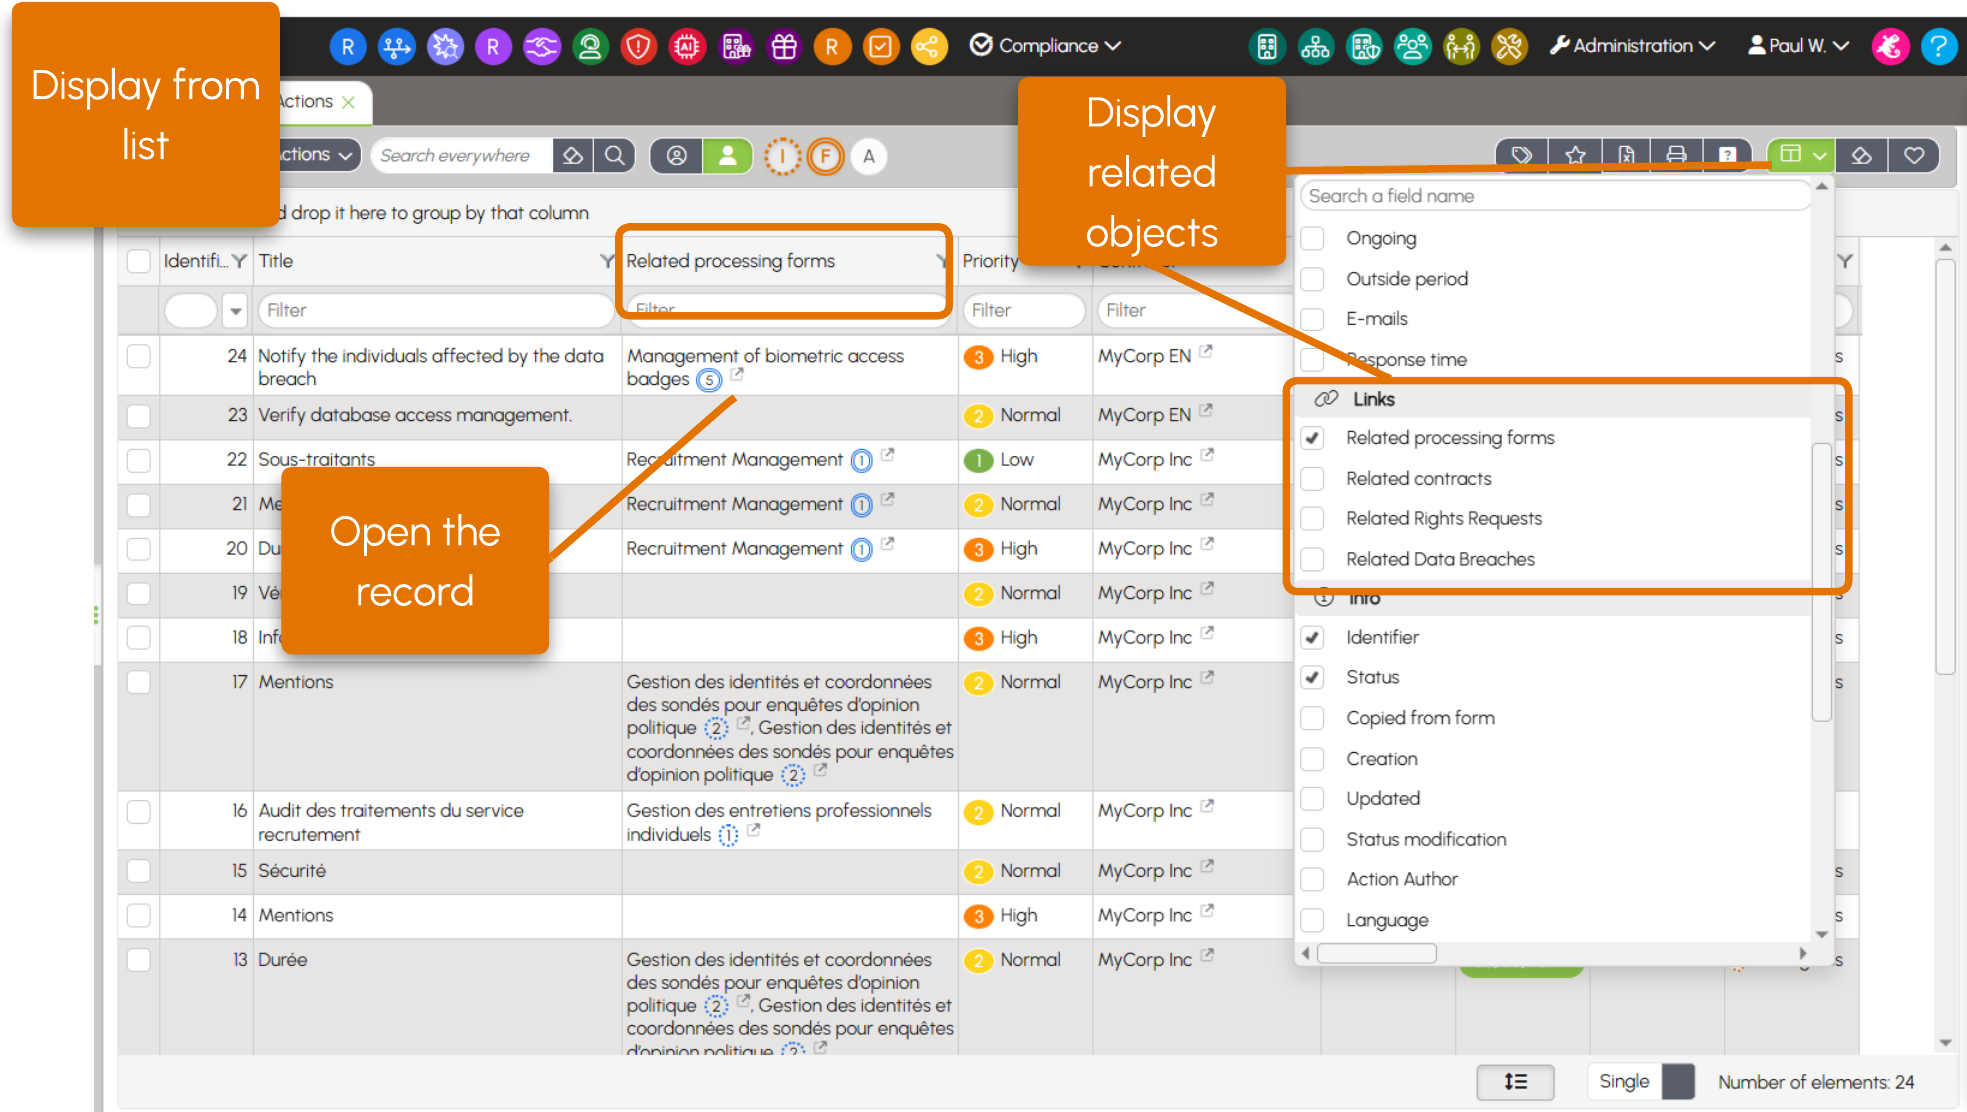
- From the processing activity lists, display the linked actions;
- From the action list, display the linked objects.
6. Close an action
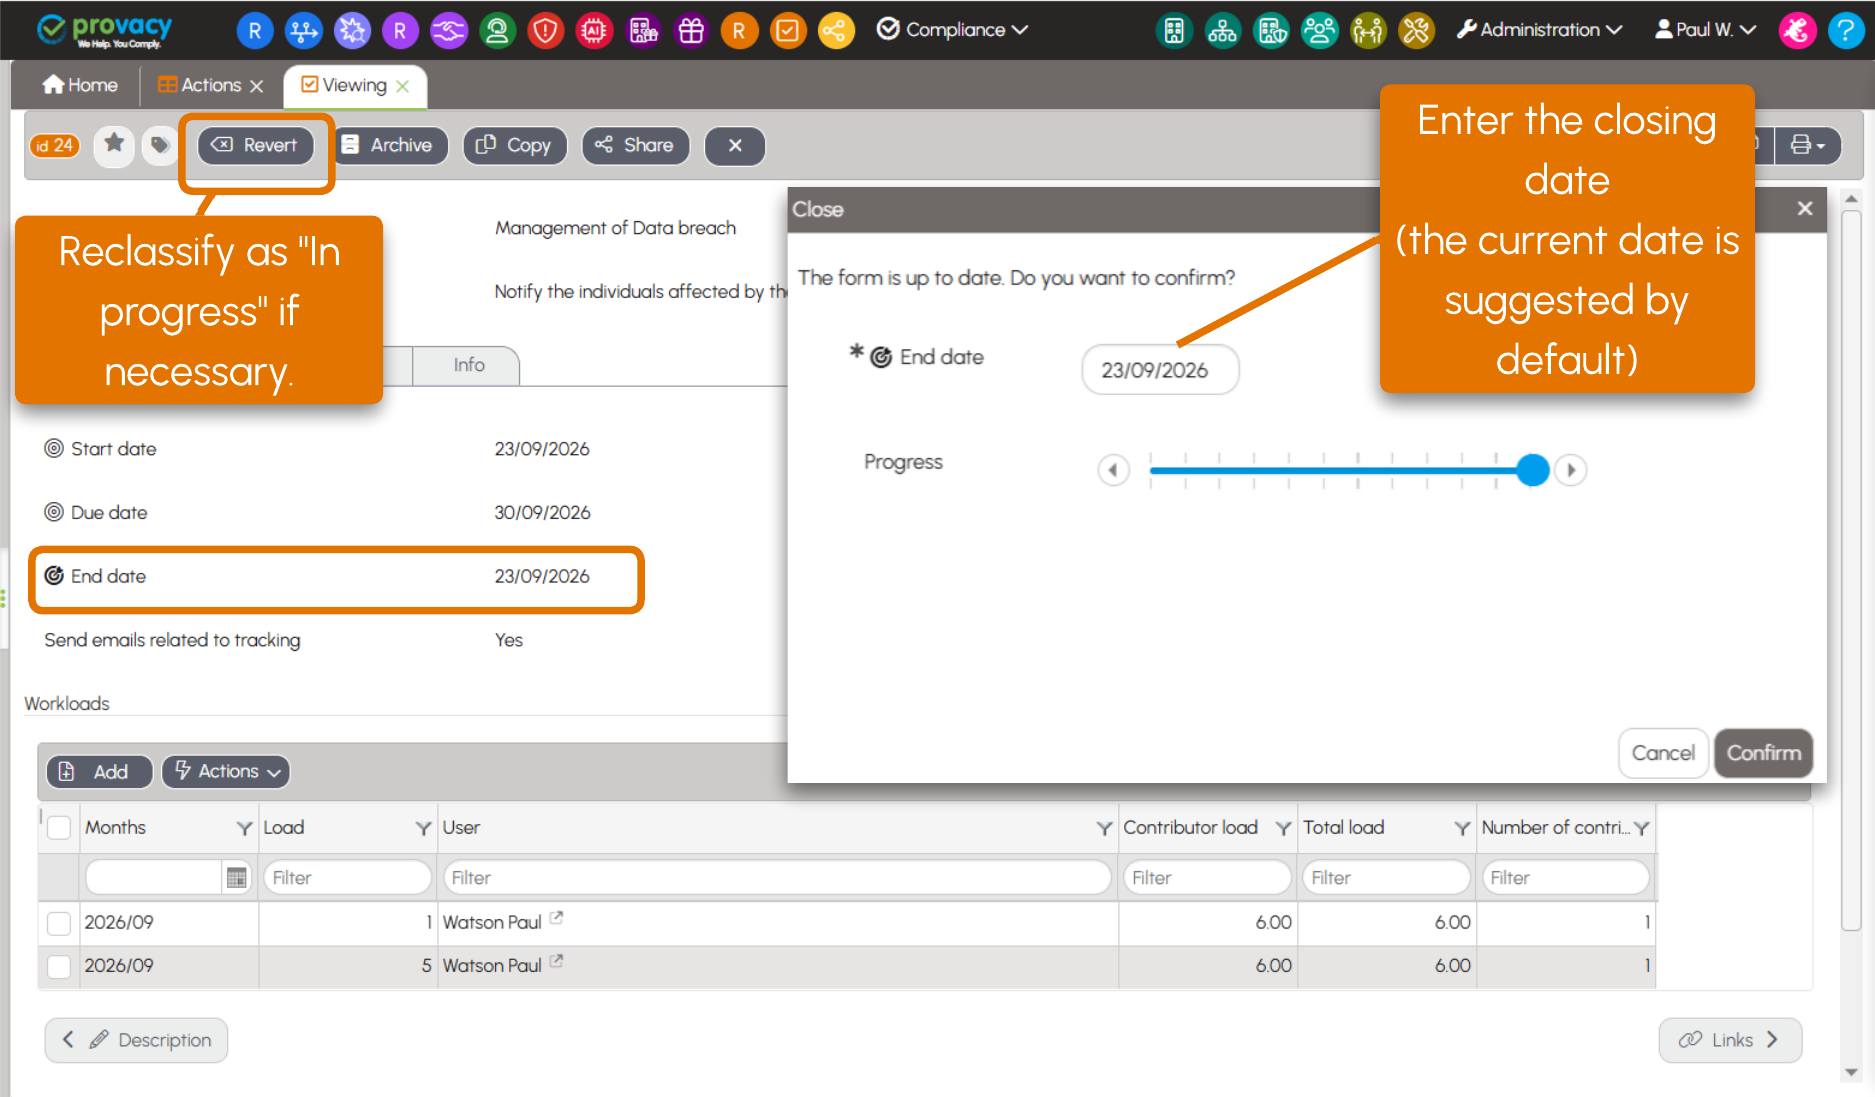
Once the action is completed, click Close. A window opens with:
- the Closing date, which defaults to the current date;
- the Progress slider.
After confirmation, the action changes from In progress  to Finished
  .
.
In case of an error, click Revert to return the action to In progress.
7. Archive
Completed actions can be archived manually using the Archive button. Provacy also offers an automatic archiving setting after a defined period. For example, actions can be automatically archived 6 months after their closing date. To activate this setting, contact Provacy Support.
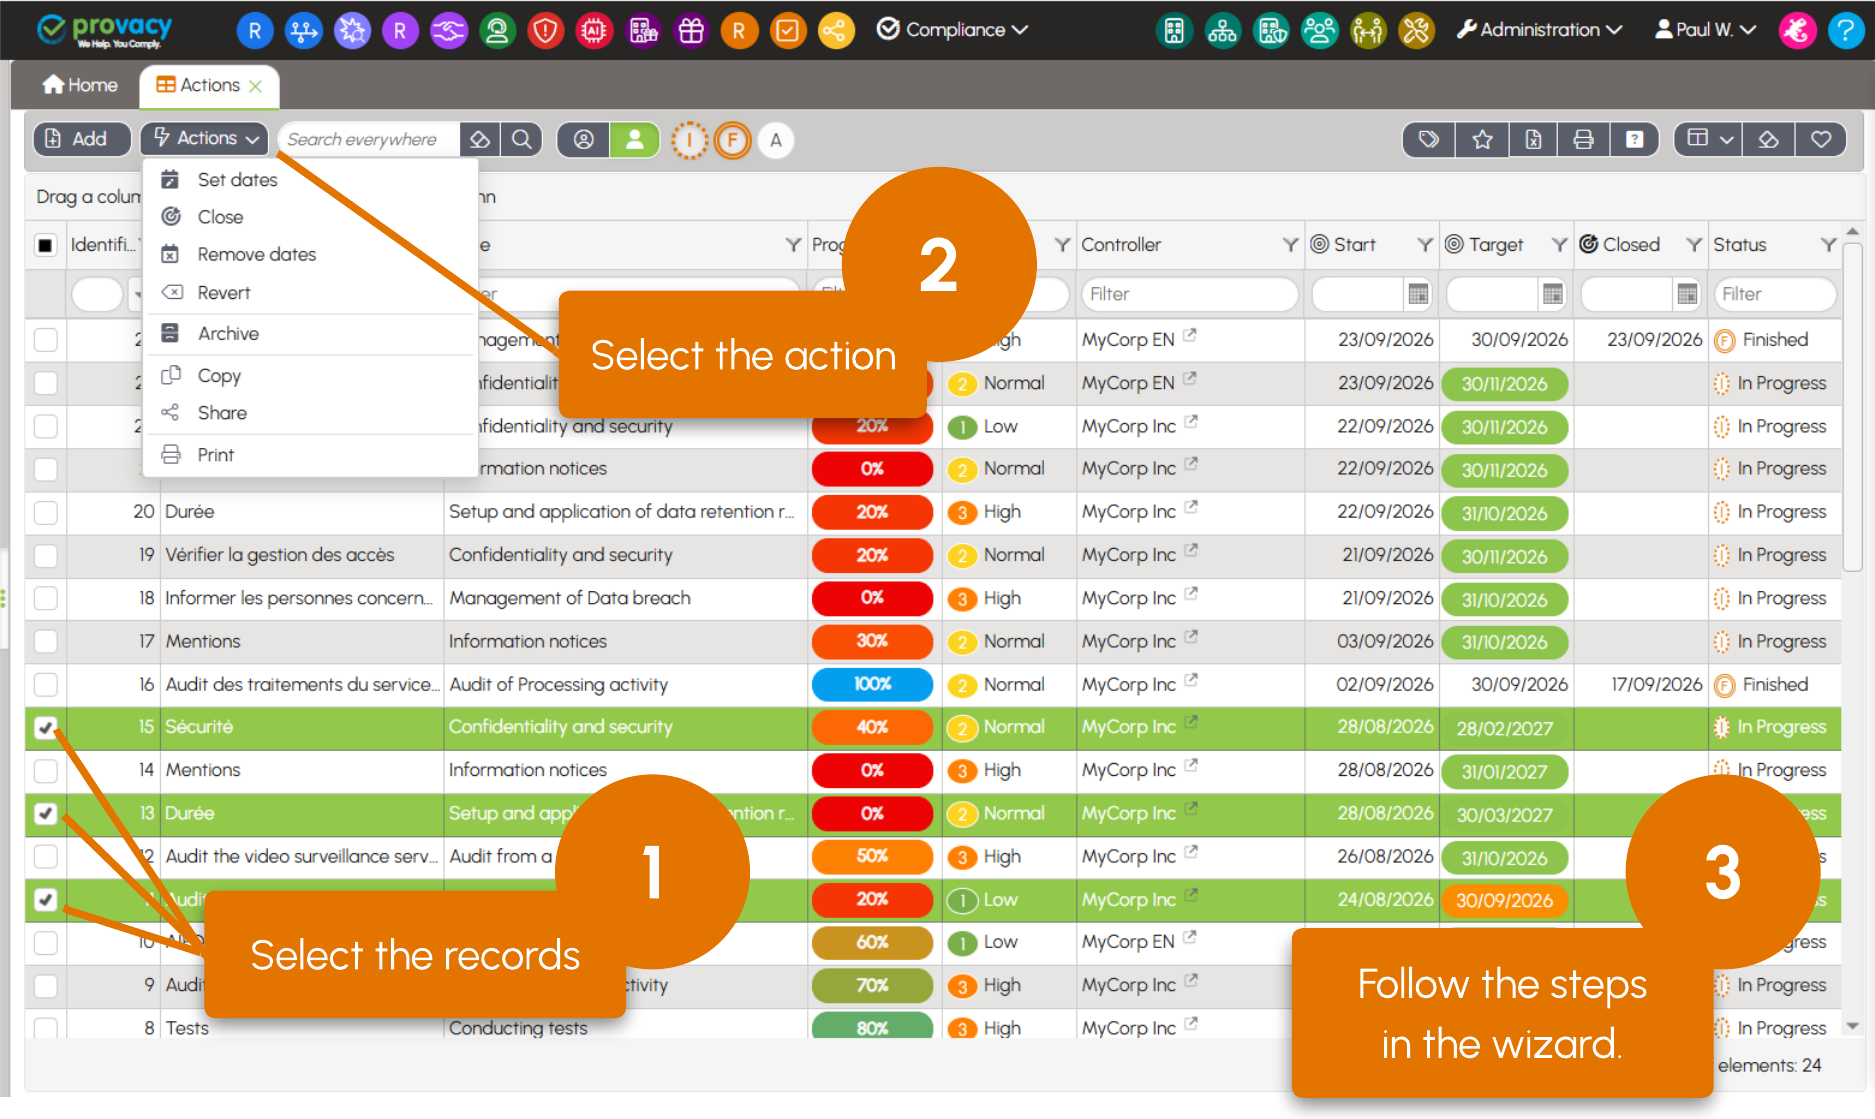
As a reminder, actions on records can also be performed in bulk from the lists. Select the relevant records, choose the action to perform, then follow the steps in the wizard.